


UPCYCLE & RECYCLE: MAKE THE MOST OF YOUR HAPPY PLANNER
Happy Earth Day! While we share our love for planners, notebooks, and all things stationery, we are also committed to sustainability and being conscious of the environment. In honor of Earth Day, we’re combining our passions for both and sharing some great ideas from the Squad on how they repurpose their Happy Planners for organization and decor!
HOW TO UPCYCLE YOUR HAPPY PLANNER
By Rebecca Propes | @rebeccaDIY
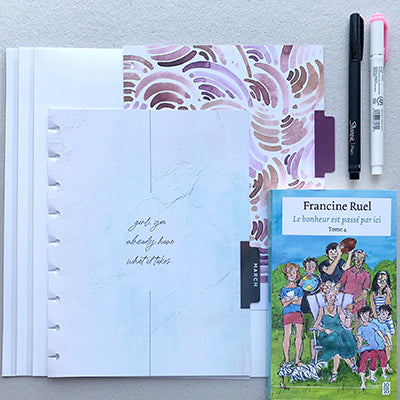
DECOR: Repurpose your Happy Planner dividers into artwork!
Hi friends! Y’all know I love a good budget DIY… But when budget DIY can be Earth Day, waste-less friendly, it’s a total win! Today I’m going to show you how to repurpose your Happy Planner dividers into functional artwork. I mean, the dividers are so incredibly cute and by no means do you want these little artwork gems to go to waste, am I right?


TOOLS:
- Paper cutter or scissors
- Frames or washi tape
- Monthly planner dividers
DIRECTIONS:
- The first step in this project would be to remove the binder edge and tab edges of the dividers either using scissors or a paper cutter. There are pretty standard sizes when it comes to picture frames so I would cut them down accordingly. Or for example, in these frames I have a little more leeway of what to cut off in order to fit the decorative element of these
- I decided I was going to use my dividers to fill some blank frames throughout my house to add in some color & pattern. You could also cut various sizes down and create a gallery while using frames or simply tape them up in an arrangement using washi tape.
- Keep in mind you don’t have to use only ones that have inspirational quotes or sayings, feel free to use ones that are simply overall patterns too! Another way to utilize dated or leftover supplies would be to add stickers to some of the prints. Didn't this turn out so CUTE? Feeling inspired? I can't wait to see what you come up with!
By Kevin Girard | @the_planner_dude
ORGANIZATION: Use your BIG Happy Planner for filing important documents at home.
Create a home filing system by upcycling a Big Happy Planner, cover, discs and some dividers. It’s easy and pretty useful. I relabeled the dividers to have sections for important papers (insurance, car, health, appliances guides, receipts, etc.). I had folders for these papers, but it always ended up with pages in the wrong folder. So now I just punch everything and put it in the right section of this DIY “home” planner.


Take old dividers that you like and you reuse them for decoration by putting them in a frame. I had a few old frames that we didn’t use anymore, so instead of throwing them away, I used them to make two Happy Planner frames for my office. A cute one for spring, which is pretty simple, and another one a little bit more useful. I put on top of the divider a blank piece of paper so I can write notes on the glass with a dry erase pen or even put some sticky notes to remind me of important things when I’m working.


I read a lot, and I always end up with an old receipt or a piece of paper as a bookmark (I always lose them) so I wanted to make a nice bookmark! I cut the dividers to be the right size for my books and then laminate them. You can use a laminator, or there are laminating sheets that are adhesive so you don’t even need a machine!

By Natasha Smalarz | @lacasadenatasha
ORGANIZATION: Repurpose the plastic packaging that comes on your new Happy Planner to make garden markers or plant markers for indoor plants!
TOOLS: You’ll need the plastic packaging from your new Happy Planner, washi tape, the recipe/food/garden sticker books, Happy Planner discs, and scissors!
DIRECTIONS:
- Cut the plastic packaging into strips, about a finger length in size. Washi tape the strips onto a Happy Planner disc.
- Grab your food, recipe, or garden sticker books and place the vegetable or plant sticker of your choice on the top of the strip.
- Place the disc in the dirt, and viola! You have your garden markers!


By Desiree Perez | @happy.2.plan
DECOR: Create an art piece for your craft room.
If you're like me and love to buy all The Happy Planner items, you probably have a growing collection of discs and dividers that you would never think to throw away. Put those extra goodies to use by creating a cute art piece to display in your craft area!
ITEMS NEEDED
- Frame (with a flat frame surface)
- Happy Planner discs (medium and mini)
- Divider
- Scrapbook paper
- Craft glue
- Xacto knife
DIRECTIONS:
- Use craft glue to glue down discs onto the frame.
- Use scrapbook paper to make a picture frame mat to go around your divider. Cut a rectangle in the middle to desired size.
- Put everything into the frame and display on a wall or shelf!


By Amanda Kramer | @createwithmandy
UTILITY: Use Happy Planner pages to make coasters!
DIRECTIONS:
- Cut old planner pages into 1” strips
- Fold the strips in half lengthwise so that they are 0.5”
- Use hot glue and roll the strips of paper until they eventually form a circle and continue until you reach your desired size. Mine ended up being about 3.75” in diameter.
- Seal the coaster by painting with Mod Podge glue which dries clear and acts as a sealant.


HOW TO RECYCLE YOUR HAPPY PLANNER
At The Happy Planner, we are committed to being environmentally conscious and are continually improving practices on how we source, produce, and package our materials.
- Our pages are CFCC and PEFC certified which means our paper is sourced sustainably. The paper used in Happy Planners can be recycled WITHOUT stickers. If you have pages with stickers, the adhesive material cannot be processed and these should not be recycled. Make sure you separate these pages before tossing in the recycle bin!
- Our plastic discs and metal discs are 100% recyclable. Whether you take them out and reuse them for other planners/projects or choose to recycle them, we hope you do your part!
- Our laminated covers are also recyclable. Add them to your recycle bin pile or try one of our craft ideas to make something new!
We hope we’ve inspired you with ways to upcycle your Happy Planner and given you some tips on how you can recycle our products to help the environment. If you try any of these out, be sure to share your DIY projects with us on social @the_happy_planner!
Happy Planning!
*Original date of post: 4/21/2021
Hi, I would like a small planner roughly 4”x 4” that has the whole month or week on one page with the holes on the right side and lined note page on the back. The skinny is too hard to write on and I only have a space roughly 4” to put the planner.
The old calendar pages can be used in making quilling paper strips also! I shred them to 1/8", which is perfect for DIY strips!
Leave a comment